
Look Configuration
Now that we've covered screen configuration, we need to put things on those screens. By default, whatever the slide looks like is what will appear on the all the audience screens, but we can change that using looks.
By default, we are on the Worship look (when looking at our propresenter computer), which you can see by looking at the moustache man on the top bar.
If we click on the moustache man, we get a list of all the looks on the computer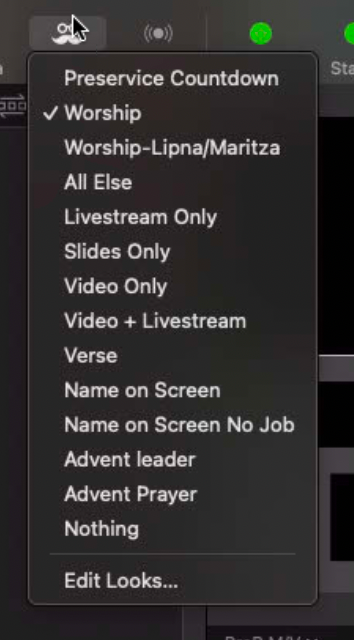
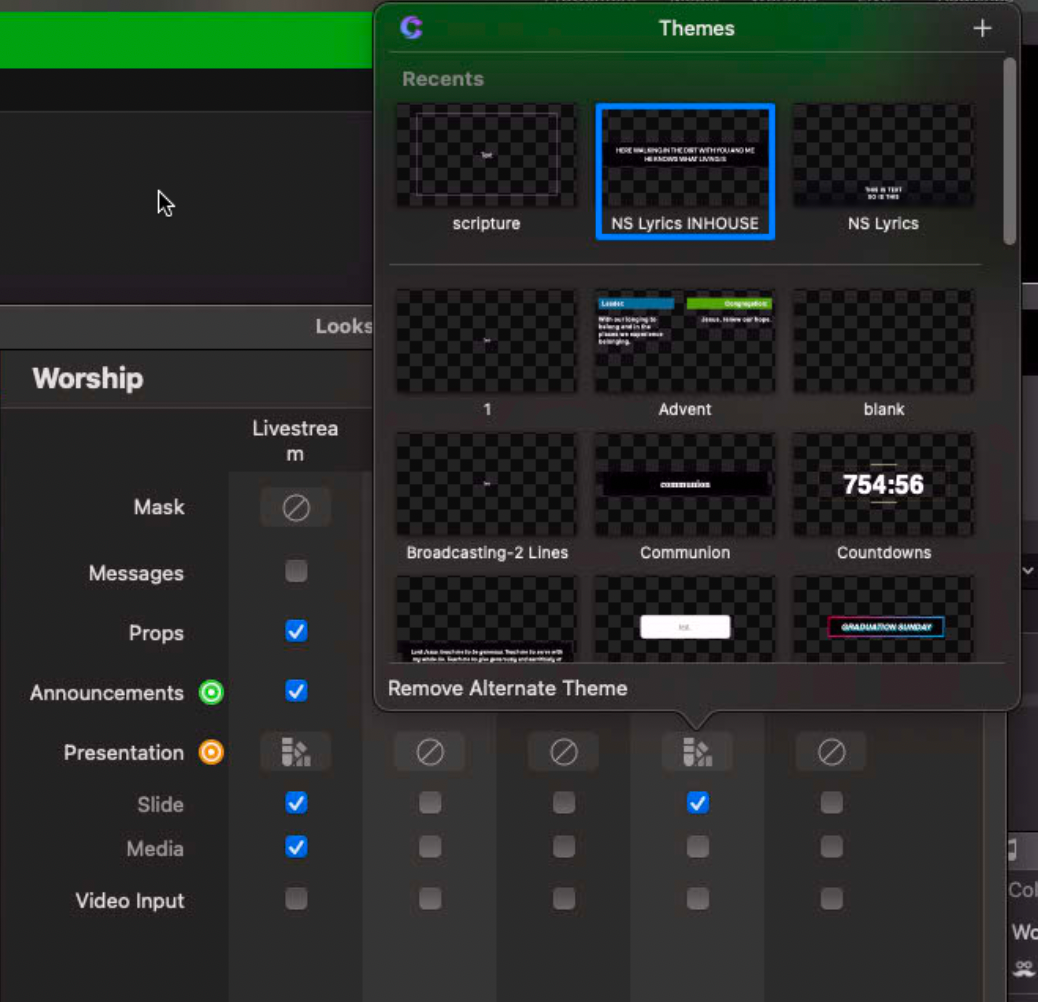
These looks each configure each output individually, which is what allows us to send slides in different ways, or even send completely different content to different screens. Let's take a look at what this configuration looks like: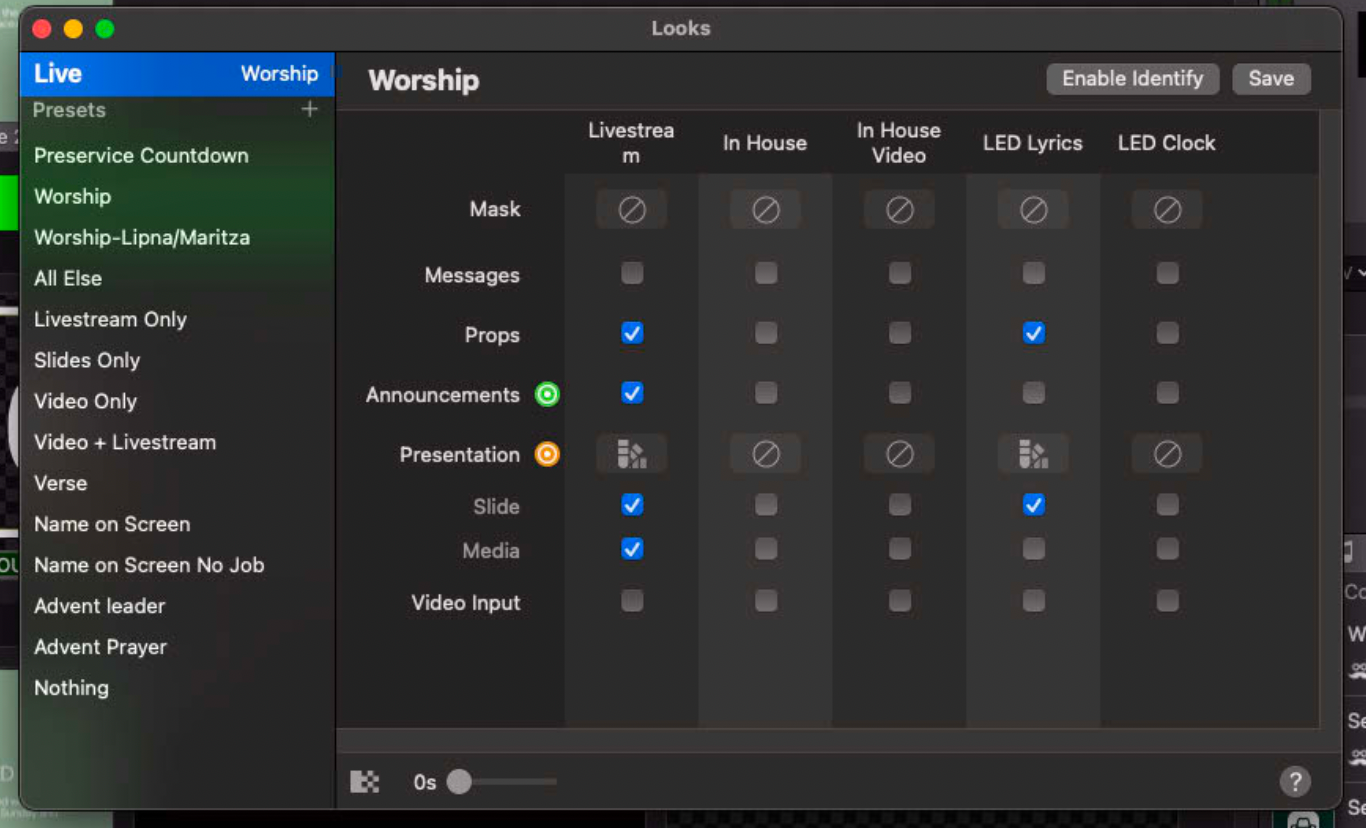
Each screen that we configured in the last tutorial appears as a column here, and the rows are the different layers we can enable/disable.
To quickly get the uninteresting ones out of the way:
- Mask allows you to put a white/black mask (similar to alpha channels in the previous tutorial) over top of the output of that screen.
- Messages are dynamic pieces of text you can send to the screens to inform the audience of things, such as notifying parents that their child needs assistance.
- Props are essentially slides that you can add on top of your existing slides. You can use them to add animation, or to display entirely different content if you disable the main presentation slide and only show the prop on that screen.
- Video input isn't something we use, but if you had video going into propresenter you could enable/disable it per-screen (eg. to send a camera to the side screens while keeping it off the centre screen).
With those out of the way, let's look at some of the more interesting ones. We'll start with
Presentation
The Presentation layer is the main layer of ProPresenter. It's where slides are sent when you trigger them in the main view (with the exception of announcement slides, which are covered further down this page). You get 3 different options per screen with the presentation layer; a theme, slide content, media content. The slide content is the text contents within the slide, whereas the media content is images, videos, etc. You can choose whether each of these are enabled or not per-screen.
The real interesting bit here is the theme override. You could simply leave it blank, which is denoted with a 🚫. In that case, the theme applied to the slide itself is what will be outputted. But if we apply an override, the slide will be completely reshuffled to match that theme. We can see that below: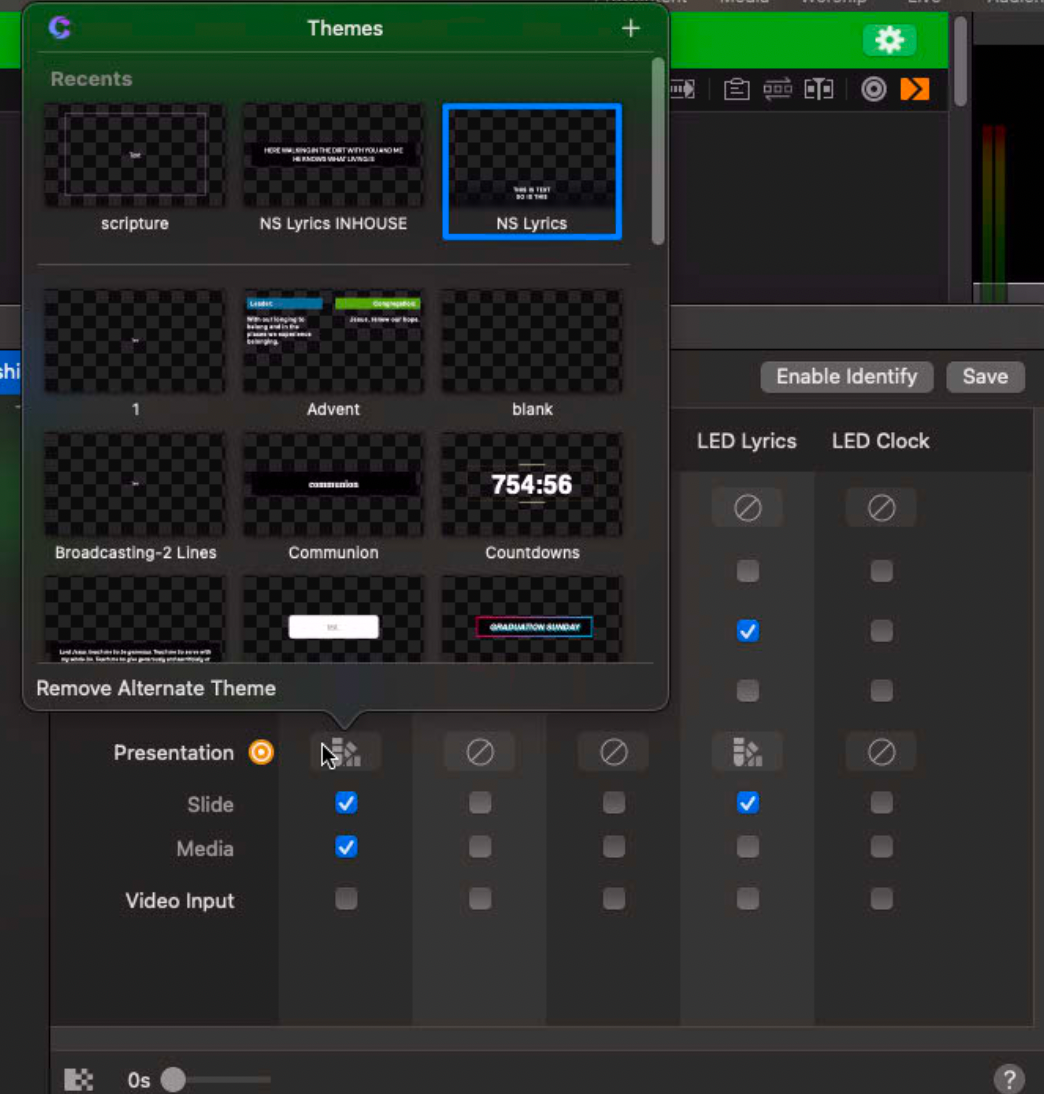
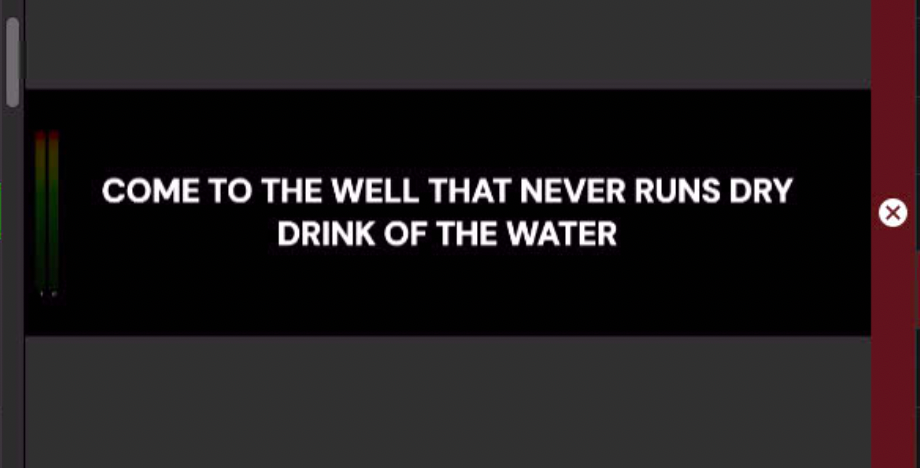
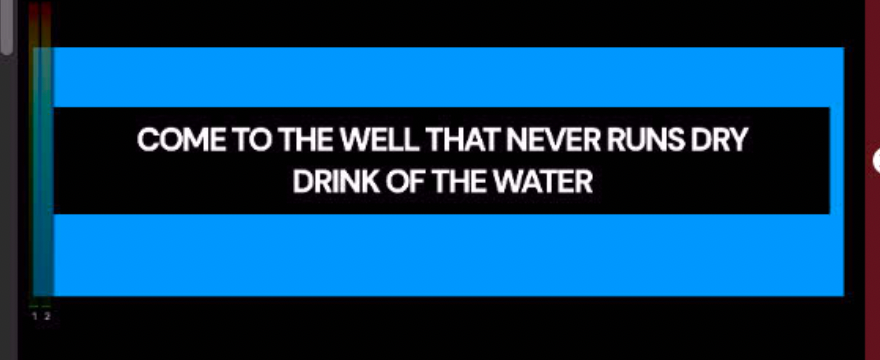
The Livestream screen is getting send the lower thirds lyrics, but the LED Lyrics are being sent the in-house lyrics. The third image below is what it would look like without an override (I've added the blue to demonstrate the black bar).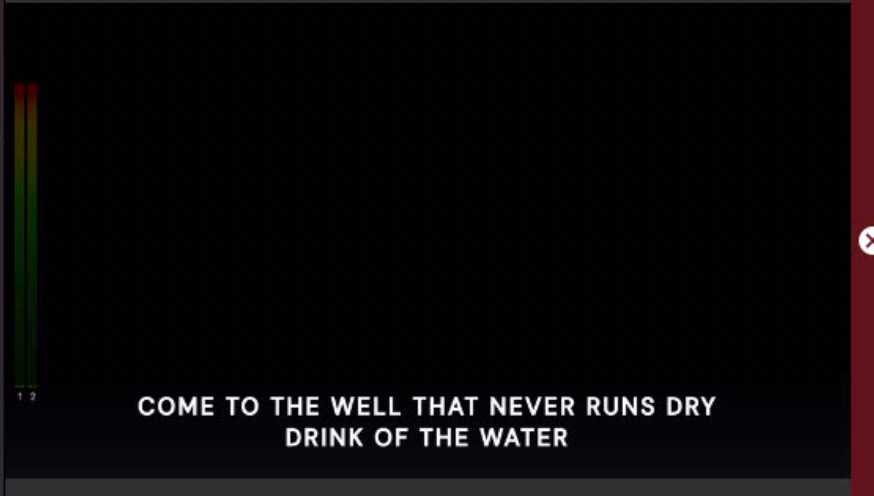
Aside from theme adjustments, we can also use the switches to control where media is sent. For example, we want to send bible verses to the In House screen, but we want to send videos to the In House Video screen. If we take a look at the video look, we can see exactly that (along with it being sent to the livestream):
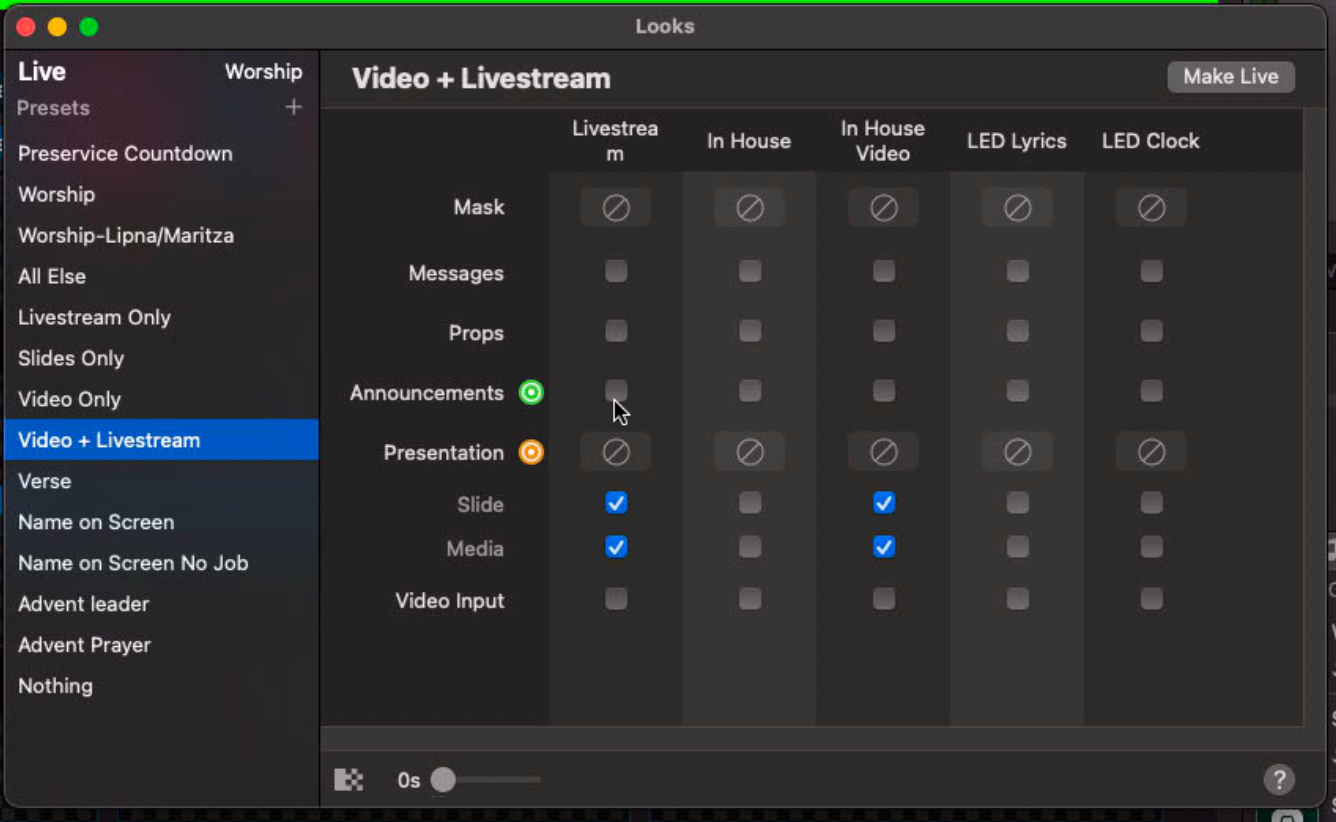
And if we look at the verse look, we'll see a similar story:
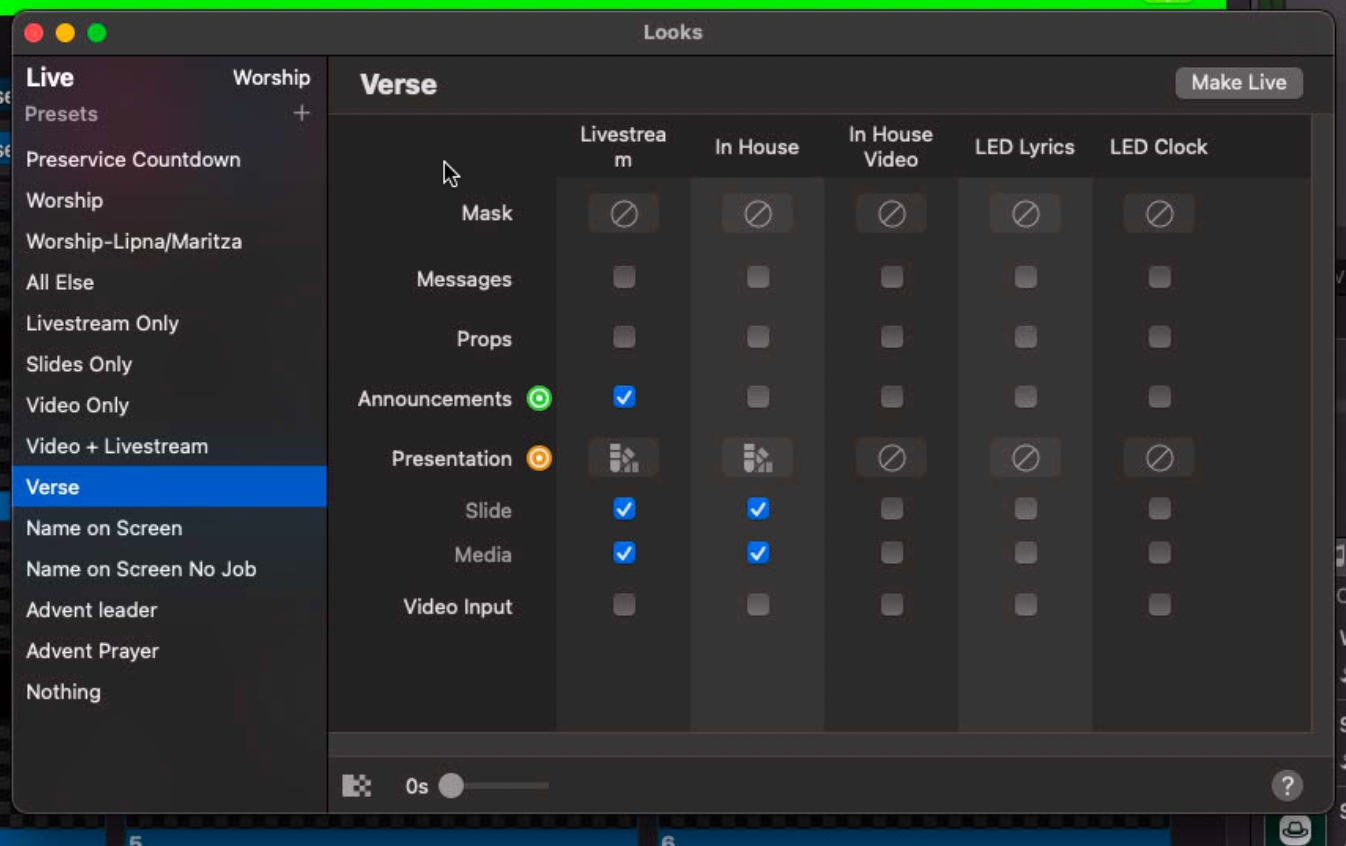
This is important due to the alpha channeling we discussed previously. A video does not need an alpha channel, but bible verses will typically be displayed in front of a background fed by a different machine (in our case, PVP).
There's one other case which can't be covered by looks alone, and for that we'll have to discuss...
Announcements
Have you ever wanted to put different content on two different screens at the same time? Good news, we do this at the start of every service! It looks something like this: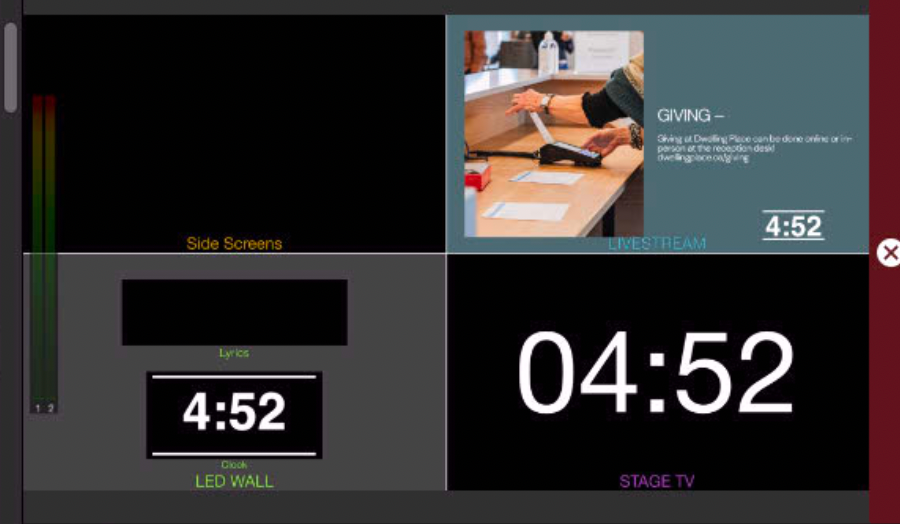
Stage TV notwithstanding (those are configured separately), we send a countdown clock to the LED Clock output, but simultaneously we send that clock overlayed on our rotating slide deck. This wouldn't be possible using only one layer of output, as the slide deck would also get sent to the LED Clock. But if you look at the slides for this, you'll notice that the clock has its own slide in its own header: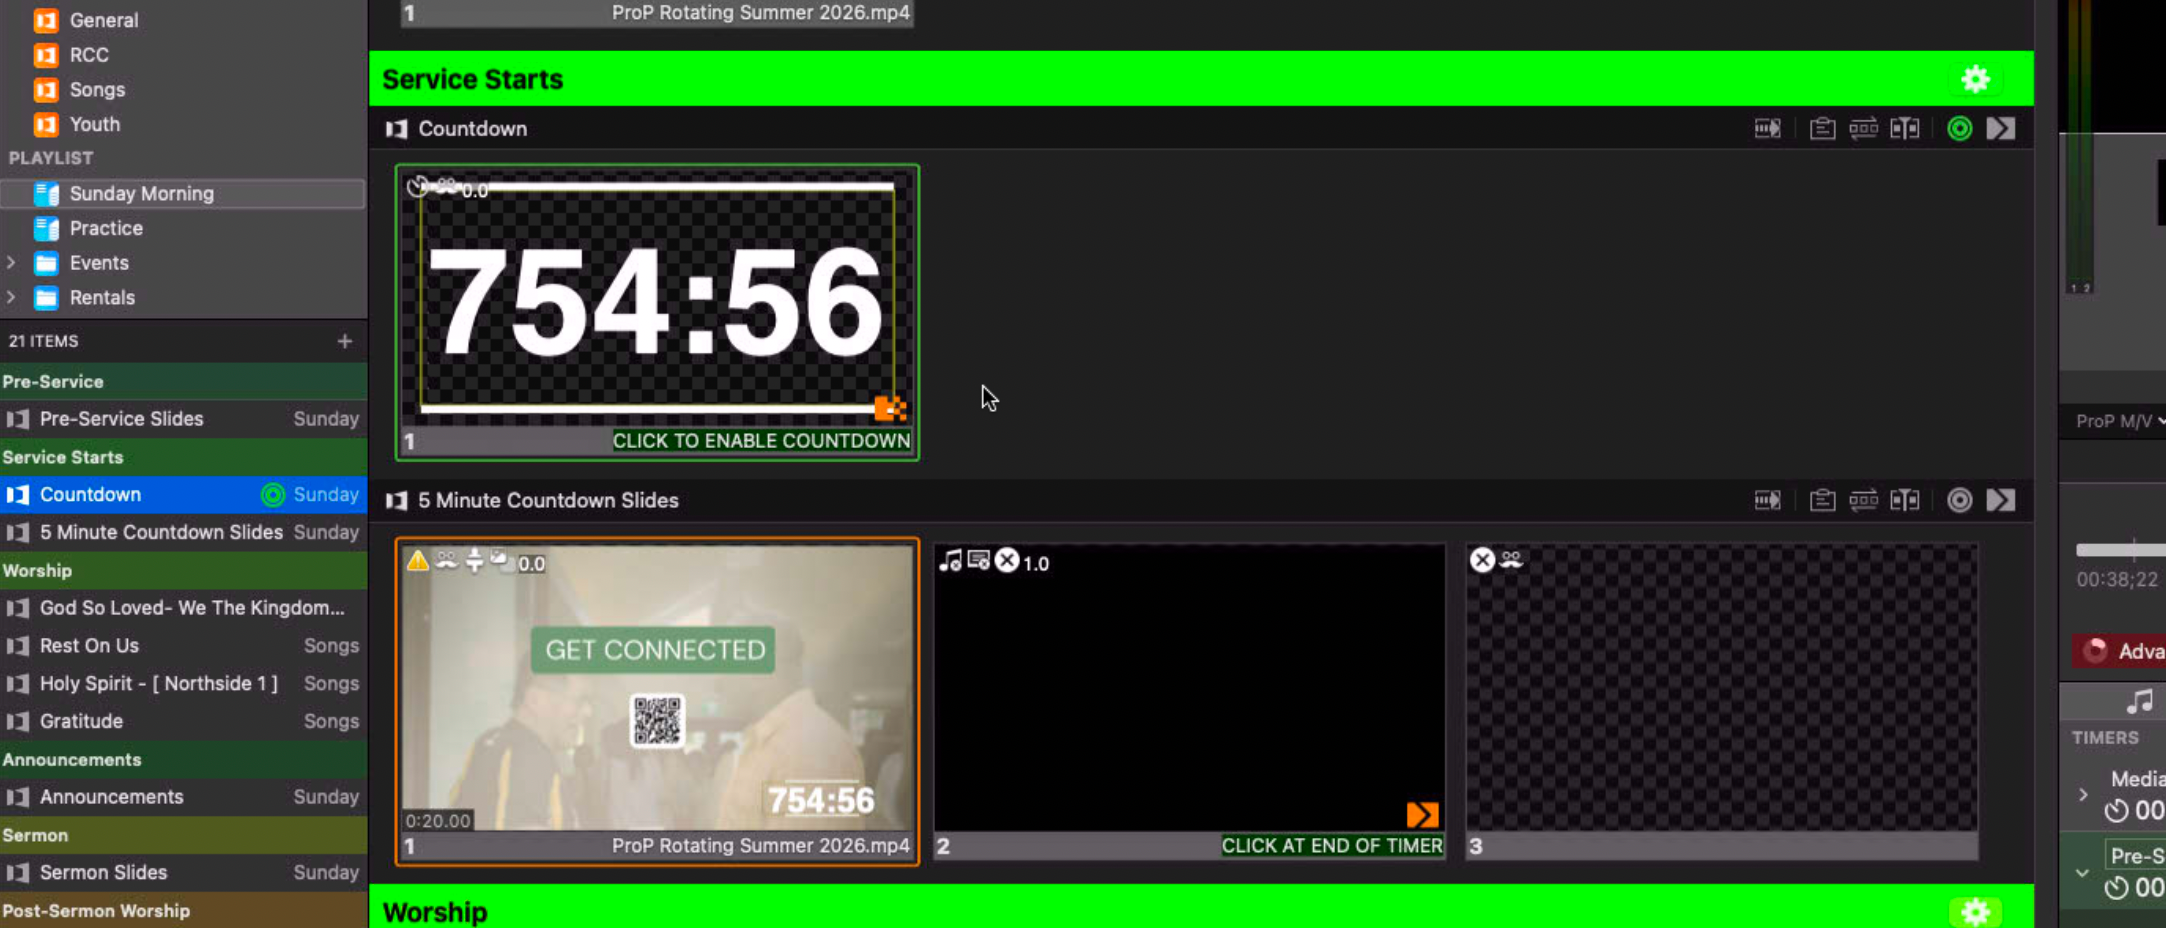
You'll also notice that it has a green box around it, and little green archery-style targets on the playlist item and the top bar of the Countdown heading. This indicates that this item is outputting to the announcement layer instead of the presentation layer, which we can route by itself as we saw above.
Lets take a peek at the Look for this.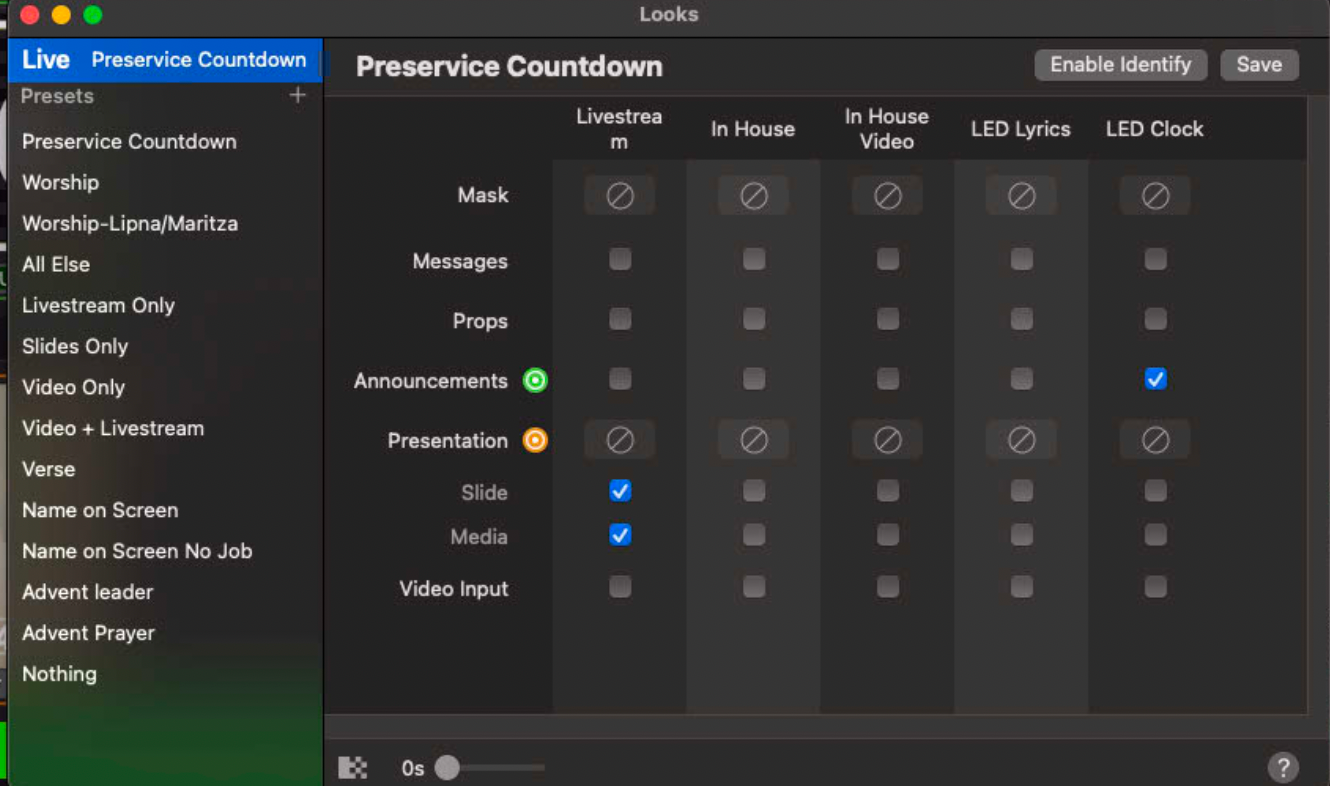
You can see the Announcement layer routed to the LED Clock and nowhere else.